Introduction
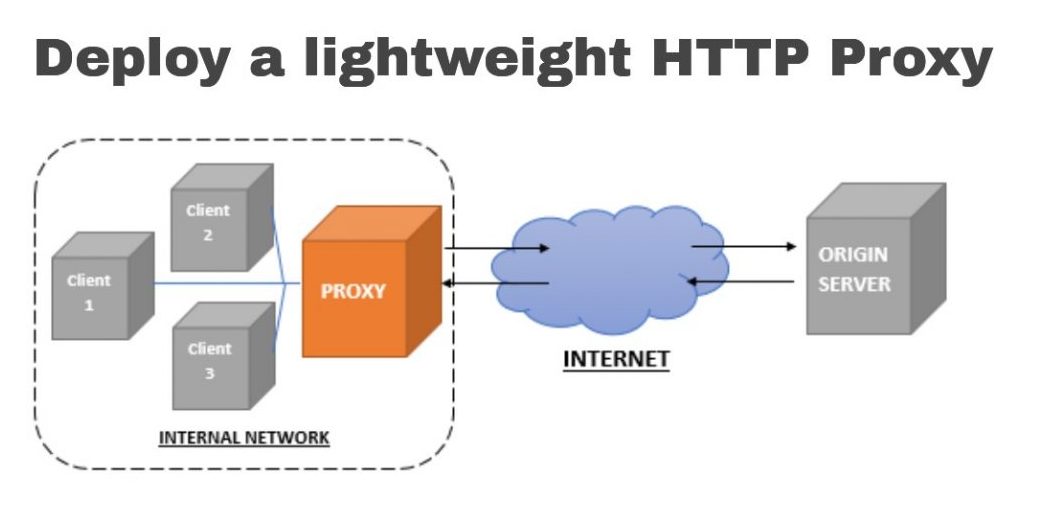
Tinyproxy is a lightweight HTTP/HTTPS proxy written in C. It is highly configurable and supports URL-based and domain-based filtering, custom headers and reverse proxying. This article will guide you through the compilation of Tinyproxy from source and its configuration in forward proxy mode.
Prerequisites
- A newly deployed Debian 10 instance with a public IP address.
- Access to a root shell via SSH or console.
- The $EDITOR environment variable should be set.
If you’re using a sudo user, obtain a root shell with sudo -s.
Installation
Step 1: Install dependencies
Start by updating your system:
apt update
apt upgrade -y
reboot
Install the packages required for fetching and building tinyproxy:
apt install -y git automake build-essential asciidoc xsltproc
Step 2: Install tinyproxy
Download tinyproxy from its github repository:
cd /tmp
git clone https://github.com/tinyproxy/tinyproxy.git
Generate the GNU configure script:
cd tinyproxy
./autogen.sh
Build and Install:
./configure
make
make install
cd ..
rm tinyproxy/ -r
Tinyproxy drops root privileges after binding to the network port. Create a user which will be used by tinyproxy:
useradd -M -U -s /bin/false tinyproxy
This command creates a user named tinyproxy without a home directory and with /bin/false as the login shell to disable login.
Create the file to be used for logging and give ownership to the tinyproxy user:
mkdir -p /usr/local/var/log/tinyproxy
touch /usr/local/var/log/tinyproxy/tinyproxy.log
chown tinyproxy:root /usr/local/var/log/tinyproxy/tinyproxy.log
Step 3: Initial Proxy Configuration
Rename the default config file and create a new one:
mv /usr/local/etc/tinyproxy/tinyproxy.conf /usr/local/etc/tinyproxy/tinyproxy.conf.orig
$EDITOR /usr/local/etc/tinyproxy/tinyproxy.conf
And input the following:
##User/Group to use after dropping root
User tinyproxy
Group tinyproxy

##Port and address to bind to
Port 8888
Bind 0.0.0.0

##File locations
DefaultErrorFile "/usr/local/share/tinyproxy/default.html"
StatFile "/usr/local/share/tinyproxy/stats.html"
LogFile "/usr/local/var/log/tinyproxy/tinyproxy.log"
LogLevel Info
PidFile "/var/run/tinyproxy.pid"

##Authentication
BasicAuth your_username your_secure_password

##HTTP Headers
ViaProxyName "server-hostname"
DisableViaHeader No

##Threading
StartServers 5
MinSpareServers 5
MaxSpareServers 10
MaxRequestsPerChild 0

##Connection
Timeout 600
MaxClients 100
(Replace your_username, your_secure_password and server_hostname with your own values).
This configuration is a sensible starting point for a basic HTTP/HTTPS proxy. It instructs tinyproxy to operate as a forward proxy with password authentication, on port 8888 on your public interface, and to drop to lower user privileges after the initial execution. It also specifies the location of various files and the maximum number of concurrent connections allowed, among other parameters.
Test your configuration by executing : /usr/local/bin/tinyproxy -c '/usr/local/etc/tinyproxy/tinyproxy.conf' followed by ss -lntp | grep tinyproxy. If tinyproxy was able to start and bind, the output of the latter command should be something like:
LISTEN    0         128                0.0.0.0:8888             0.0.0.0:*        users:(("tinyproxy",pid=27638,fd=0),("tinyproxy",pid=27637,fd=0),("tinyproxy",pid=27636,fd=0),("tinyproxy",pid=27635,fd=0),("tinyproxy",pid=27634,fd=0),("tinyproxy",pid=27633,fd=0))
LISTEN    0         128                   [::]:8888                [::]:*        users:(("tinyproxy",pid=27638,fd=1),("tinyproxy",pid=27637,fd=1),("tinyproxy",pid=27636,fd=1),("tinyproxy",pid=27635,fd=1),("tinyproxy",pid=27634,fd=1),("tinyproxy",pid=27633,fd=1))
And try sending a connection through the proxy:
curl --proxy http://127.0.0.1:8888 --proxy-user your_username https://httpbin.org/ip
Curl will prompt you for the proxy password. If the connection succeeds, your server’s IP should be returned in the response.
Step 4: Service File
Kill any tinyproxy processes before proceeding:
pkill -e tinyproxy
We will wrap the tinyproxy executable in a systemd unit file for easy service management abilities, such as starting, stopping, autostarting at boot, etc. Use the following command to create a service file:
$EDITOR /etc/systemd/system/tinyproxy.service
And paste the following:
[Unit]
Description=Tinyproxy daemon
Requires=network.target
After=network.target

[Service]
Type=forking
PIDFile=/var/run/tinyproxy.pid
ExecStart=/usr/local/bin/tinyproxy -c '/usr/local/etc/tinyproxy/tinyproxy.conf'
Restart=on-failure

[Install]
WantedBy=multi-user.target
Save and exit, then reload the systemd configuration:
systemctl daemon-reload
You can now use systemctl to start, stop and restart tinyproxy as follows:
systemctl start tinyproxy
systemctl stop tinyproxy
systemctl restart tinyproxy
If tinyproxy should be started automatically, execute the command:
systemctl enable tinyproxy.service
Step 5: Authentication configuration (optional)
We configured the proxy to use password authentication. If you’d like to whitelist certain IPs instead, comment the BasicAuth line and whitelist the IP addresses that should be allowed to connect using the following syntax:
Allow IP_ADDR[/xx]
For example:
[...]

##Authentication
#BasicAuth your_username your_secure_password
Allow 127.0.0.1
Allow 192.168.0.0/24
Allow 203.0.113.113
ViaProxyName "server_hostname"

[...]
NOTE: By whitelisting/blacklisting any host or network with Allow/Deny, all other hosts are denied access. If no Allow or Deny keywords are present, all hosts are allowed to connect.
The configuration shown here would allow connections from 127.0.0.1 (i.e. the loopback interface), from the whole /24 range of the local 192.168.0.x private network, and from the remote host with IP address 203.0.113.113/
Restart the tinyproxy daemon whenever you make changes to the configuration:
systemctl restart tinyproxy.service
More Info
- tinyproxy(8) Manual
- tinyproxy.conf(5) Manual
Does it work with websocket?
May or may not work. See this pull request
sorry, but most distros do have tinyproxy as a package. For example the aforementioned debian buster. Using the package does not only cut more than half of this tutorial, it also ensures you dont break stuff. Also, the conf that comes with debian 10 is almost like yours, only 2 or 3 lines need be changed. so please, use the package manager if it provides a package!